Employee Email Setup on Android & iPhone Devices
Employee Email Setup on Android Devices
Technology Support
This is based on Android OS 4.3 (Jelly Bean). Older versions might be slightly different.
NOTE: If you are adding the university email to your mobile device, you must setup a passcode lock. Contact itsupport@uttyler.edu if you need assistance.
Below are the step-by-step instructions on how to add your university email to your Android device:
|
Step 1:
|
Step 2:
|
|
Step 3:
|
Step 4:
|
|
Step 5:
|
Please don't hesitate to email us at itsupport@uttyler.edu or come by BUS 101 if you have any problems or questions.
Do NOT send your password.
Do NOT send your Social Security Number.
Employee Email Setup on iOS Devices
NOTE: If you are adding the university email to your mobile device, you must setup a passcode lock. Contact itsupport@uttyler.edu if you need assistance.
Below are the step-by-step instructions on how to add the university email to your iPhone/iPad device:
|
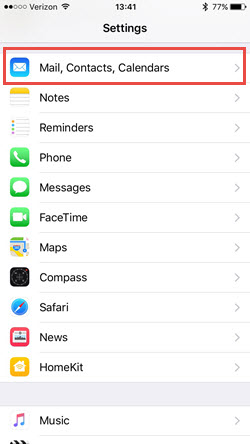
Step 1: Tap Settings > Mail, Contact, Calendars |
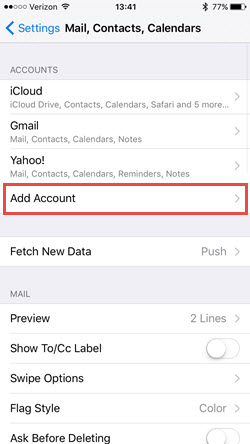
Step 2: Tap Add Account |
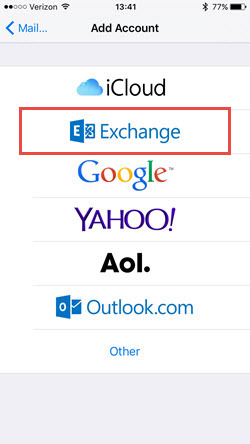
Step 3: Tap Exchange |
 |
 |
 |
|
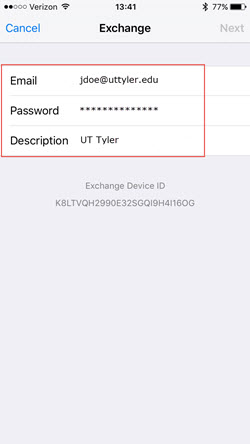
Step 4: Enter your email address and regular password, and click Next |
Step 5: Fill out the Server and Domain information as shown below, and click Next |
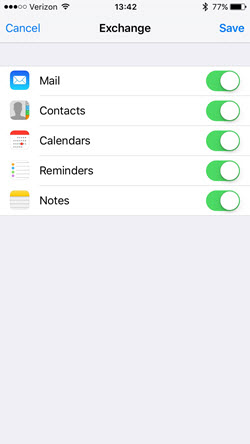
Step 6: Choose which features to enable for the account, and click Save |
 |
 |
 |